Tank Maya: The Siren's Bulwark
 Siren
SirenMaya abandons her glass-cannon roots to become a nearly unkillable mobile support pillar. The Rough Rider locks her shield at zero permanently, keeping Fleet active at all times for 110% movement speed. Stacking max health to nearly 8.3 million HP makes Elated's percentage-based team regeneration so powerful it can instantly top off teammates from near-death. For OP10 co-op this is the hardest build to bring down in the game.
Damage
Mid-range Pearlescent AR damage amplified by Wreck, Reaper, and Chain Reaction ricochets. Lower peak DPS than pure caster builds.
Survivability
8.3M HP at OP10, permanent 20% damage resistance, and percentage-based Sustenance regen. Essentially unkillable at max health.
Boss
Reliable at OP10. Phaselock applies triple elemental DOTs via Ruin. Lower DPS ceiling means boss kills take longer than glass-cannon setups.

Siren
Maya is the Siren of Borderlands 2, one of only six Sirens in existence. Her action skill, Phaselock, suspends a single enemy in a pocket dimension. The Harmony tree turns that ability into a full healing engine: Elated regenerates team health as a percentage of max health while Phaselock is active, and Restoration adds bonus healing by shooting allies directly.
.avif&w=3840&q=75)
Pearlescent Jakobs assault rifle whose projectiles travel straight before splitting into three after a set distance. At the right range all three projectiles connect, tripling effective damage. Keep Accelerate unspecced. Boosting projectile speed pushes the split point further away and shrinks the damage window.
How to Obtain
.avif&w=3840&q=75)
Jakobs shield with zero capacity that can never charge. Equipping it puts Maya in a permanent 'shield-depleted' state, which keeps Fleet active around the clock for +50% base move speed, boosted to +110% by the Breakneck Banshee class mod. The 20% damage resistance and max health bonus are secondary benefits that still matter at OP10.
How to Obtain
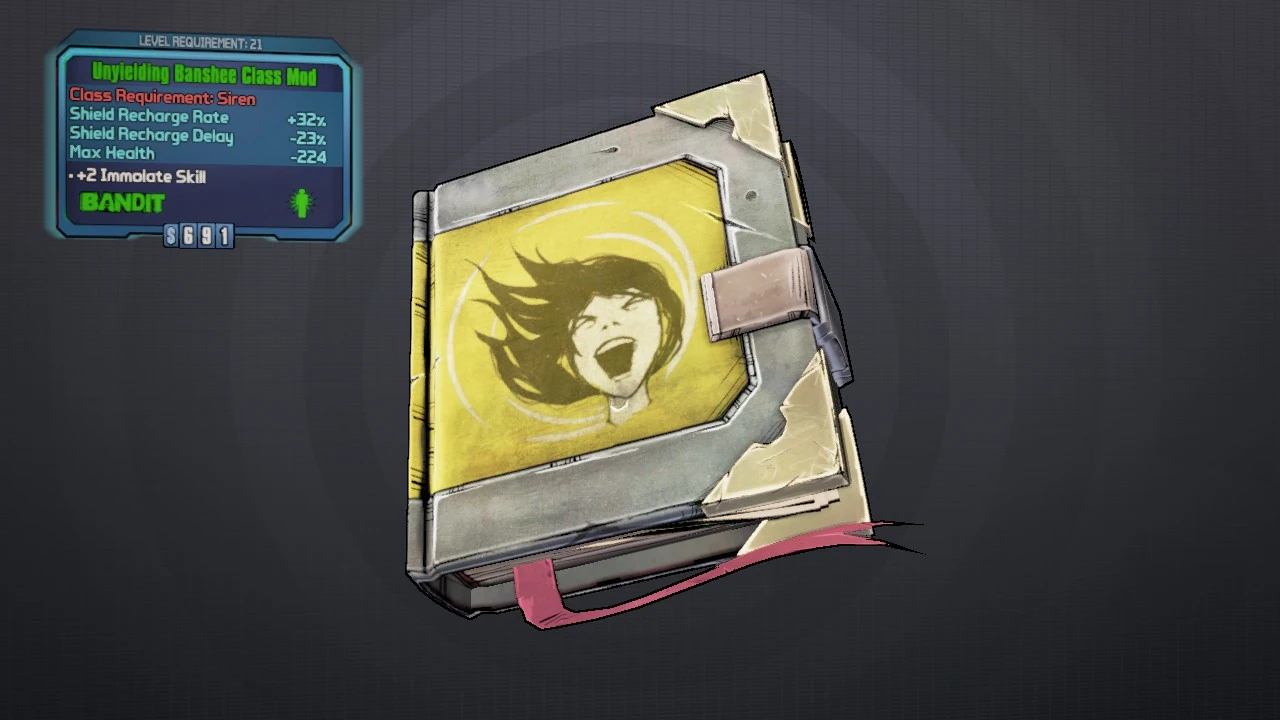
Blue-rarity Maya class mod that pushes Fleet from +50% to +110% movement speed when combined with the Rough Rider. Use a Level 50 copy farmed in True Vault Hunter Mode. This preserves the full +6 Fleet and +5 Immolate skill boosts while keeping the max health penalty as low as possible, which is critical for the health-stacking strategy.
How to Obtain
.webp&w=3840&q=75)
E-Tech relic that raises max health by a percentage and boosts ammo capacity for two weapon types. The health multiplier is the keystone of the entire build. At OP10 with the right roll, it pushes the combined health pool past 8 million HP, which turns Elated's percentage ticks into enormous raw HP numbers.
How to Obtain
.avif&w=3840&q=75)
Seraph-tier slag grenade that also heals allies on contact. Each orb applies slag to grouped enemies while the healing proc keeps health topped up between Phaselock casts. The best grenade option for co-op sessions where teammates need consistent coverage.
How to Obtain
Combat Strategy
- ▸Confirm the Rough Rider is equipped. Fleet must be active before the fight starts.
- ▸Slot the O-Negative for co-op healing, or the Quasar for mobbing and group pulls.
- ▸Enter at close-to-mid range so Bekah projectile splits connect consistently.
- ▸Cast Phaselock on the highest-priority target immediately. Ruin applies slag, shock, and corrosion to the entire group at once.
- ▸Open fire with the Bekah while Phaselock is active. Wreck adds fire rate and gun damage, and Chain Reaction ricochets rounds to adjacent targets.
- ▸Elated begins ticking percentage-based health regen for the whole team the moment Phaselock locks an enemy.
- ▸When Phaselock is on cooldown, toss a Scorn orb to slag groups and maintain the damage bonus for teammates.
- ▸Sustenance regenerates health passively once it drops below the threshold. At 8 million HP the raw HP-per-second recovery is substantial.
- ▸Fire the O-Negative at downed or low-health teammates. The slag orbs apply a heal on contact.
- ▸Use Life Tap kills to burst-recover health after heavy fire. One kill can offset significant chip damage.
- ▸Speed is your primary defensive layer. Use the 110% movement bonus to constantly reposition rather than absorbing hits in place.
- ▸Use Converge to pull scattered enemies into a tight cluster before firing. The singularity groups them for Chain Reaction ricochets and ensures Ruin's elemental spread hits the whole pack.
- ▸Never spec Accelerate. It pushes the projectile split range on the Bekah, Sawbar, Pimpernel, and Lyuda beyond practical engagement distance.
Sources
Verified: 2026-05-13 · All content is original with full credit to original creators.