Auto Axe Boss Melter
The Slasher update capped total weapon swing speed at 200%, so speed effects can add at most +100% combined. This build stacks the Rapid legendary star, the Turbo receiver, and Martial Artist for roughly +255%, and the Turbo receiver alone now exceeds the cap. The other two speed sources contribute nothing, which drops the attack rate and the continuous damage that scales off it below what this page describes. The same update also converted Solar Powered into a single-rank card, so the perk allocation shown here no longer matches the game.
A Ghoul bruiser built for Infestation bosses, where it can solo the whole encounter. It restores the Auto Axe's pre-nerf attack rate by stacking three separate speed sources: the Rapid legendary star, the Turbo receiver, and the Martial Artist perk. Hellcat Power Armor supplies flat ballistic damage reduction while Brick Wall removes staggering entirely, so the build never has to leave melee range of a boss. Luck of the Draw and Stable Tools repair the weapon mid-fight, and the team-gated multipliers from Taking One for the Team and Strange in Numbers roughly double total output.
Damage
~600 per body hit, 800 to 1000 per head hit on bosses
Survivability
12% flat ballistic reduction, compounding Sentinel's, full stagger immunity. An absolute tank
Boss
Demolishes Infestation and nuke bosses solo

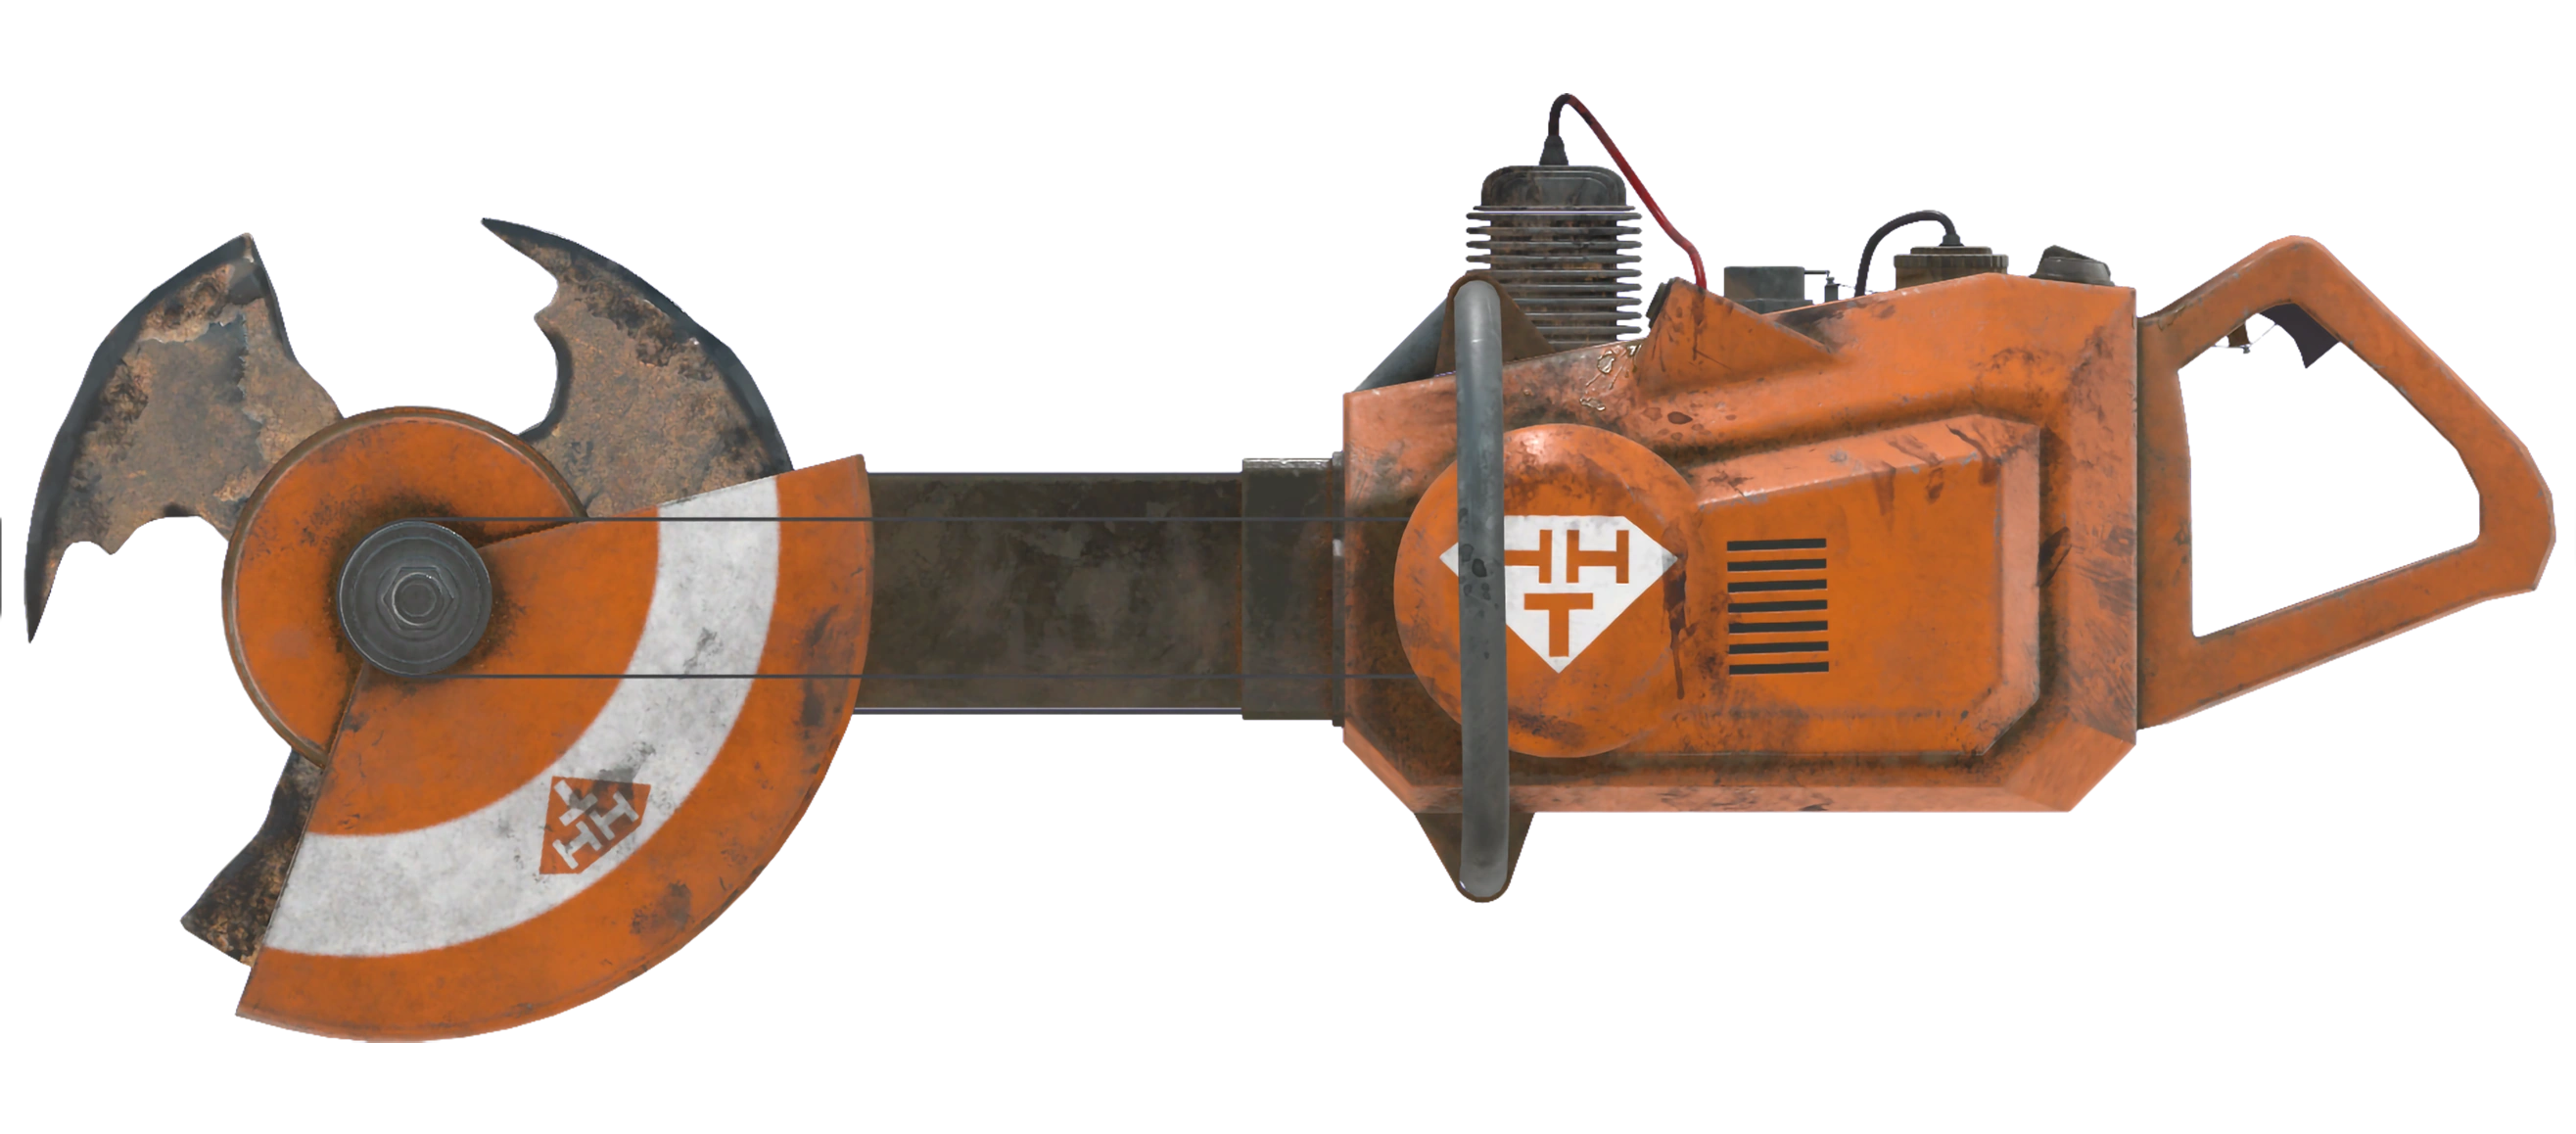
The build's only damage source. It is a motorized industrial saw that deals continuous damage while the attack button is held, draining Action Points as it runs. Roll Furious in the first star for stacking damage, Rapid in the second for raw swing speed, and Strength in the third to push melee scaling higher.
Legendary Stars / Receiver
- ▸Furious (1st Star, Mandatory)— Adds 5% damage per Onslaught stack and raises the stack ceiling by 9. Sustained Auto Axe fire fills the stacks almost instantly.Wiki
- ▸Rapid (2nd Star, Mandatory)— Raises weapon speed by 25%. This is the first of the three swing-speed sources the build depends on.Wiki
- ▸Strength (3rd Star)— Adds +3 Strength on a weapon, which feeds straight back into the Auto Axe's +5% damage per Strength point.Wiki
- ▸Turbo Mod (Mandatory)— Adds +200% attack speed at the cost of 33% damage. The creator rates it the best current mod for automatic melee weapons because the speed gain more than pays for the damage cut.Wiki
Alternative Weapons
- Any Automatic Melee Weapon
- ChainsawWiki
How to Obtain

Picked specifically for its flat ballistic damage reduction, which is applied before armor resistance is calculated and therefore outperforms sets with higher listed numbers. A full six-piece set cuts incoming ballistic damage by 12%, which is what boss melee attacks deal.
Legendary Stars (per piece)
- ▸Mutant's (1st Star)— Grants up to 5% damage reduction as your mutation count rises. With ten serums active it is always near maximum value.Wiki
- ▸Powered (2nd Star)— Adds 5% Action Point regeneration per piece and stacks additively across the set. Action Points are the Auto Axe's real ammo.Wiki
- ▸Sentinel's (3rd Star)— Reduces damage taken to 95% per piece while standing still, compounding across the set. Melee range against a boss usually means standing still anyway.Wiki
- ▸Bruiser's (4th Star, Recommended x5)— Adds 5% melee damage per piece, up to 25% on a full stack. This is the creator's recommended fourth star on every piece.Wiki
Fourth-Star Fallback
- 4x Aegis + 1x Bruiser'sWiki
How to Obtain
Ten serums are held at once. Class Freak at rank three cuts every drawback by 75%, and Strange in Numbers makes each positive effect 25% stronger while a mutated teammate is nearby, so the whole stack behaves as close to pure upside.
Standard pre-boss buff stack. The build runs Carnivore, so meat-based food gives double hunger satisfaction, double health restoration, and double consumable buffs with no disease risk. Layer the Strength and Melee bobbleheads on top before a damage phase.
Combat Strategy
- ▸Join any public team so Taking One for the Team and Strange in Numbers can activate.
- ▸Eat irradiated food to push the Glow meter high, which switches on Brick Wall, Action Ghoul, Jaguar Speed, and Science Monster.
- ▸Consume the meat-based Carnivore buff stack plus the Strength and Melee bobbleheads.
- ▸Confirm all ten mutations are active and Class Freak is sitting at rank three.
- ▸Crouch and open from stealth so Ninja doubles the first damage window.
- ▸Target a limb first so Bone Shatterer cripples it and turns on Tormentor and Slugger.
- ▸Take one hit deliberately to trigger Science Monster and Taking One for the Team.
- ▸Hold the attack button on the boss's head for the Faulty Spots weak point bonus.
- ▸Stay stationary while attacking so Sentinel's compounding damage reduction applies.
- ▸Let Tenderizer stack toward its 100% cap while Furious builds Onslaught stacks.
- ▸Watch the left side of the screen for the Luck of the Draw repair animation and keep swinging through it.
- ▸Aim for the head at all times. Body hits land around 600 while head hits reach 800 to 1000.
- ▸Stop attacking during a reflective boss phase or the returned damage will kill you.
- ▸Land one deliberate hit during a reflective phase anyway to keep Taking One for the Team refreshed.
- ▸Kill add spawns as they appear to keep Adrenaline and Adrenal Reaction stacks topped up.
- ▸Born Survivor auto-uses a Stimpak below 40% health once every 20 seconds without breaking the attack loop.
- ▸Powered pieces refresh Action Points quickly when the Auto Axe drains the bar.
- ▸Stable Tools and Luck of the Draw together keep the weapon alive, though it will still break eventually on long fights.
Sources
Verified: 2026-07-30 · All content is original with full credit to original creators.