Naoe Ultimate Bo Staff Build
 Naoe
NaoeAn endgame Bo setup built around guaranteed critical hits after switching targets, full Armor Piercing on critical hits, and powerful post-kill damage and Posture Damage bonuses. Perfect Flow attacks and Windstep control groups, while an additional Bo Chain Assassination gives Naoe a strong stealth opening.
Damage
Guaranteed target-swap crits with 100% Armor Piercing.
Survivability
Perfect Flow and Windstep pushback maintain breathing room.
Boss
High crit and Posture Damage, no demonstrated boss benchmark.

Naoe
A mobile shinobi whose Bo Mastery tree adds three combat stances, timed Perfect Flow attacks, and wide-area control. Her Katana Mastery investment also scales Oni's Bite, converting spare points into Critical Damage for this Bo setup.
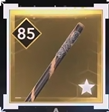
The build's only weapon. Its fixed engraving turns correctly timed Perfect Flow attacks into crowd-control bursts, while the added Armor Piercing engraving lets the headband's guaranteed critical hits ignore enemy defenses.
Engravings
- ▸Perfect Flow Attacks Push Back and Damage Surrounding Enemies (fixed)— Successful Perfect Flow timing produces the area burst that keeps groups away from Naoe.Wiki
- ▸+100% Armor Piercing on Critical Hits— Apply this engraving so the guaranteed critical hit after each target switch also bypasses armor.Wiki
How to Obtain
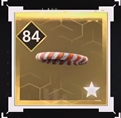
Guarantees a critical hit after Naoe switches targets, which suits the build's constant movement through groups. The transferred Bo Master engraving extends Bo Chain Assassination by one target for a longer stealth opener.
Engravings
- ▸Guaranteed Critical Hit After Switching Targets (fixed)— Changing targets primes the next hit to critically strike, activating Equality's Armor Piercing engraving.Wiki
- ▸Extra Target on Bo Chain Assassination (from Bo Master Headgear)— Raises the Bo Chain Assassination limit from three targets to four.Wiki
How to Obtain
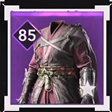
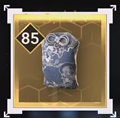
The trinket converts Katana Mastery investment into Critical Damage even while Naoe fights with the Bo. Elegance Defined's transferred engraving adds Posture Damage for every Bo Mastery point, rewarding investment in both trees at once.
Engravings
- ▸+2% Critical Damage per Mastery Point in Katana (fixed)— Every Katana-tree point adds Critical Damage without requiring a Katana to be equipped.Wiki
- ▸+1% Posture Damage per Mastery Point in the Bo Tree (from Elegance Defined)— Transfer Elegance Defined's engraving to scale every Bo-tree point into Posture Damage.Wiki
How to Obtain
Combat Strategy
- ▸Confirm Equality has the Armor Piercing on Critical Hits engraving before entering combat.
- ▸Transfer the Bo Master Headgear engraving to the Bo Disciple Headband and the Elegance Defined engraving to Oni's Bite.
- ▸Invest through the supplied Bo tree first, then place spare Mastery Points in Katana to scale Oni's Bite.
- ▸Prioritize Critical Damage, Critical Chance, and Posture Attack Damage in Knowledge, with the remaining points left flexible.
- ▸Approach from stealth and use Bo Chain Assassination to remove up to four nearby enemies before open combat begins.
- ▸Switch to a fresh target immediately after the stealth chain so the Bo Disciple Headband primes a guaranteed critical hit.
- ▸Use Windstep when the remaining group begins to surround Naoe, gaining reach and impact while moving between targets.
- ▸Change targets between attacks to keep triggering guaranteed critical hits and Equality's 100% Armor Piercing roll.
- ▸Time light or heavy follow-ups when the Bo flashes for Perfect Flow, producing Equality's area pushback and extra damage.
- ▸Spend each post-kill robe bonus on the next target with a Posture Attack so direct and Posture Damage spike together.
- ▸Use High Posture to interrupt attacking enemies, Low Posture to trip isolated targets, and Neutral Posture to restore spacing.
- ▸Parry or secure kills during Windstep to extend its duration through Momentum instead of recasting it early.
- ▸Use Flurry of Blows against a durable single target when armor break, Vulnerable, and recovery matter more than area control.
- ▸Use Grab and Throw on an armored enemy inside a group to break its armor while knocking nearby enemies away.
Sources
Verified: 2026-10-05 · All content is original with full credit to original creators.