Immortal Shield Precision Fighter
 Fighter
An endgame Dark Arisen Fighter for Hard mode that wins fights by standing still. Shield Precision lands True Deflects for you without any input, and Deflected Impact turns every one of them into damage, so enemies hurt themselves on your shield while you hold your ground. Everything else is about Stamina. Gigantus's Vim, Stamina Boost rolls, and a Mage pawn with Celestial Paean keep a pool of roughly 4,600 Stamina topped up, and Plenilune Slash and Cloudfall Strike punish the openings. Grab attacks are the one thing your shield can't stop.
Damage
Passive Deflected Impact damage on every auto-deflect, plus Plenilune Slash burst
Survivability
Effectively immortal against anything blockable. Grabs are the weakness
Boss
Shown beating the empowered Dark Arisen final boss on Hard

Fighter
Fighter is the sword and shield vocation, a jack of all trades that blocks, parries, and draws enemy attention for the party. Dark Arisen gives it Shield Precision, a master skill that lands perfect deflects automatically whenever you are guarding.
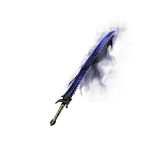
Relic sword carrying the two skill upgrades this build swings with. Cloudfall Strike lets you leap to weak spots high on a monster, and Plenilune Slash is the biggest active damage the Fighter has. The creator farmed the same boss many times to land this roll, and it is the target to chase.
Target Rolls
- ▸Cloudfall Strike— Upgrades Cloudward Slash into a rising and falling combo that hits flying, jumping, or launched foes harder. Your main tool for reaching weak spots.Wiki
- ▸Plenilune Slash— Upgrades Full Moon Slash into a flurry of spinning cuts that ends in a heavy sweep. Highest burst on the Fighter, but it costs a lot of Stamina.Wiki
- ▸Battle Frenzy— Raises damage dealt and damage taken. Battle Frenzy III is the ideal tier. The showcased roll is lower.Wiki
- ▸Improved Empale— Boosts Empale, the follow-up thrust on downed foes. Knocked-down trash dies in one hit, and bosses take a big one-off punish when they fall.Wiki
- ▸Aggressive Recovery (Alternative)— Swap for Improved Empale if you get swarmed while pinning enemies. Attacks can restore Health, so you heal as you fight.Wiki
How to Obtain
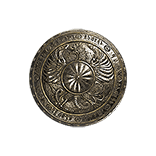
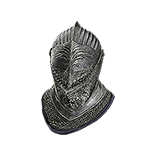
Relic helm. Its job is to carry one of the Stamina or aggro rolls listed in Armor Target Rolls.
How to Obtain
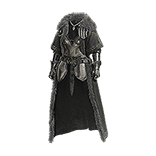
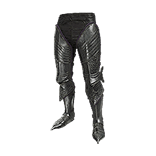
Two armor rolls make the build work. Gigantus's Vim roughly doubles your Stamina, and Provoking Aura pulls every enemy onto you so your deflects keep firing. After those, fill the remaining slots with Health Boost and Stamina Boost.
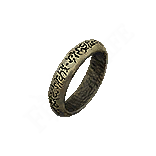
Speeds up Stamina recovery. Consumables and the pawn are the main Stamina plan, but this ring eases the drain when you would rather not burn items.
How to Obtain
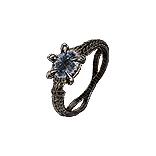
The one pawn requirement. Celestial Paean sends out a wave of holy light that speeds up Stamina recovery and cuts damage taken for allies it touches. With about 4,600 Stamina you can usually hold out between casts without consumables. Since you are tanking, ranged pawns get free time to deal damage.
Combat Strategy
- ▸Bring a Mage pawn with Celestial Paean. Its wave of light speeds up your Stamina recovery.
- ▸Fill out ranged pawns if you can. You hold aggro, so they get free time to deal damage.
- ▸Pack Stamina consumables for long fights where the pawn's casts are spread out.
- ▸Stay in a neutral stance with your guard ready. Shield Precision only triggers when you are not mid-attack.
- ▸Let enemies swing into you. Every automatic True Deflect deals damage through Deflected Impact.
- ▸Against trash, finish downed enemies with Empale. Improved Empale kills most of them in one hit.
- ▸Use Plenilune Slash when a boss is staggered or recovering. It is the Fighter's highest active damage but drains a lot of Stamina.
- ▸Use Cloudfall Strike to reach weak spots high on large monsters. It fits into shorter openings than Plenilune Slash.
- ▸When climbing a dragon, drive Gutting Skewer into a weak spot.
- ▸Watch for grab attacks. They bypass your shield and hit very hard on Hard difficulty.
- ▸Health Boost rolls exist to survive the grabs and breath attacks that do land.
- ▸If you get knocked down, use Flawless Guard to get back on your feet faster.
- ▸Swap Improved Empale for Aggressive Recovery if you keep getting hit while pinning enemies in a crowd.
Sources
Verified: 2026-10-21 · All content is original with full credit to original creators.