Skyborne Mystic Spearhand
 Mystic Spearhand
An endgame Dark Arisen Mystic Spearhand for Hard mode that hardly ever touches the ground. Dragoun's Pounce can be recast every time it connects, so as long as your Stamina holds you keep chaining it through the air. When a chain breaks, Skiedragoun's Edacite cancels the landing recovery and soaks up fall damage. Mirour Shelde blocks the hits you can't dodge, and Ravinour's Hond drains Stamina from small enemies to keep the loop running.
Damage
Constant hybrid physical and magick damage from endless Pounce chains
Survivability
Glass cannon. Mirour Shelde and constant movement avoid most hits
Boss
Shown taking down Satanachia on Hard mode

Mystic Spearhand
Mystic Spearhand is a hybrid vocation for the Arisen only, wielding a duospear that deals both physical and magick damage. It scales off Strength and Magick together and mixes close-range strikes with binding bolts, barriers, and aerial dives.
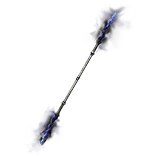
Relic duospear and the heart of the build. The base weapon matters less than its Special Skills: Dragoun's Pounce and Skiedragoun's Edacite unlock the advanced forms of the two skills the whole combo runs on. The showcased Majestic roll reaches 2,106 Strength and 1,895 Magick.
Target Rolls
- ▸Dragoun's Pounce— Mandatory. Upgrades Dragoun's Foin so it can be recast again and again as long as each hit connects.Wiki
- ▸Skiedragoun's Edacite— Mandatory. Upgrades Skiedragoun's Feste with a shockwave after the dive. Pairs with Dragoun's Pounce to cancel landing recovery.Wiki
- ▸Battle Frenzy III— Raises damage dealt and damage taken. You should rarely get hit, so the downside barely matters. Battle Frenzy IV is the ideal roll.Wiki
- ▸Vertiginous Strike— Boosts the finishing hit of Winding Cut at full spin speed. Present on the showcased roll but not part of the core combo, so treat this slot as open.Wiki
How to Obtain
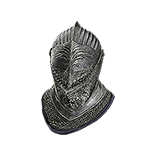
Relic helm chosen for Enhanced Jump. The extra jump height is a bonus, but the real reason is the boost to physical damage dealt in mid-air, which is where this build spends most of its time.
Target Rolls
How to Obtain
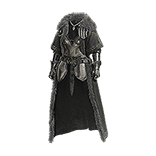
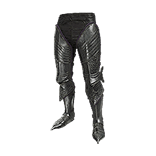
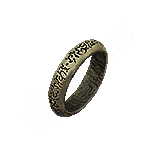
A straightforward Stamina ring. More Stamina means more Pounces before you have to land.
How to Obtain
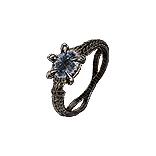
Any pawn setup works, but a Mage with Celestial Paean is the one recommendation. It doesn't trigger often, but while its holy light is up, Stamina recovers faster, so you can stay in the air chaining Pounces without worrying about the gauge.
Combat Strategy
- ▸Cast Mirour Shelde on the ground before you take off so the barrier is up for the first exchange.
- ▸Bring a Mage pawn with Celestial Paean. Its wave of light speeds up Stamina recovery when it lands.
- ▸Pack a few Stamina consumables for fights without small enemies to drain.
- ▸Chain Dragoun's Pounce into itself. Every hit that connects lets you recast it, so you can stay airborne indefinitely.
- ▸As soon as a Pounce misses or Stamina runs low, cast Skiedragoun's Edacite to cancel the falling recovery frames.
- ▸Hindringe Mirke can also follow a Pounce to cancel the fall and soften landing damage.
- ▸Most enemy attacks are aimed at the ground, so constant movement in the air dodges a lot on its own.
- ▸Use Ravinour's Hond on small enemies to drain a large chunk of Stamina back into you.
- ▸Exaltation speeds up Stamina recovery so a whiffed Hond doesn't leave you exhausted.
- ▸When the barrier breaks and you can't outmaneuver an attack, land and recast Mirour Shelde.
- ▸Avoid greedy extra hits once the barrier is gone. Health Boost rolls help, but this is still a glass cannon.
- ▸Satanachia has no trash adds, so Ravinour's Hond can't feed you there. Lean on consumables and Celestial Paean instead.
- ▸Against flyers like griffins and harpies that drag you high up, always end the chain with Edacite so the fall doesn't hurt.
- ▸Edacite and Hindringe Mirke soften most falls, but not drops from extreme heights.
Sources
Verified: 2026-10-19 · All content is original with full credit to original creators.