Infinite Ammo Assassin's Bow
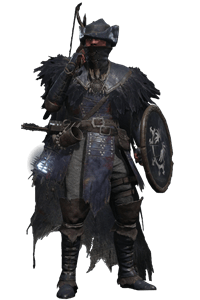 Blackfeather Ranger
A ranged build that stacks multiplicative bonuses onto the Assassin's Bow until a volley of arrows deletes bosses from across the arena. Two off-hand weapons are carried purely as rune batteries, contributing 50% increased ranged damage between them without ever being swung. The Umbral Eye of Lydia the Numb Witch turns spent ammo into withered health that is refunded on every connecting shot, so accurate play means the quiver never actually runs dry.
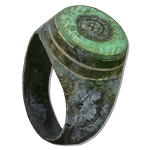
Damage
50% from five Aelstrix runes, up to 25% from Princess' Sting, 20% from the ranger ring. A+ Agility scaling at +10
Survivability
Light armor, 50 Vitality, no defensive layer. Range is the defence
Boss
Full boss roster cleared without summons on NG+1. 50% bonus soul damage on soulflay
Blackfeather Ranger
The game's dedicated archer class, starting with a bow and the highest Agility of the ranged starts. Agility is the stat that scales bow damage, so the class begins with its damage stat already pointed in the right direction.
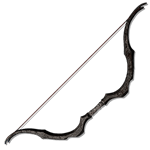
The build's only real weapon and the best bow in the game for raw output. It reaches A+ Agility scaling at +10, which is the highest of any bow, and its damage is split four ways so almost nothing resists the whole package. The trade is a slow pull on the heavier shots, so the opening draw against a moving target takes some getting used to.
Ammunition
- ▸Weighted Arrows— The pure physical option and the highest raw physical arrow at 207. Costs only 2 ammunition per shot, which matters because the Lydia eye charges you health once the quiver is empty. This is the default pick against anything without a clear elemental weakness.Wiki
- ▸Radiant Arrows— Holy damage arrows, and the answer to the Rhogar and undead enemies that resist physical. 437 Holy on top of 115 Physical for the same 2 ammunition cost as Weighted, so the only reason not to carry them is availability.Wiki
- ▸Cinder Arrows— Fire damage for enemies that shrug off physical and holy. The 3 ammunition cost is the highest of the three arrows, so save these for targets that are genuinely weak to fire rather than firing them as a default.Wiki
How to Obtain
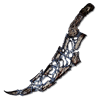
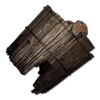

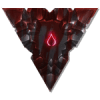
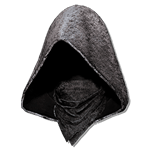
A light hood picked for the tattered ranger silhouette and its very low weight. Its damage mitigation is unremarkable, though the Frostbite and Poison resistances are surprisingly high for a 3.5 weight piece.
How to Obtain
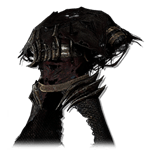
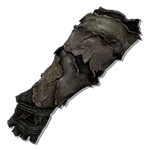
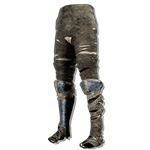
Every armor piece here was chosen for weight and appearance, not protection. The Princess' Sting damage bonus scales inversely with how full your equip load bar is, reaching 25% only with nothing equipped at all, so each point of armor weight is a direct damage loss. The four pieces below total 37.4 weight, which lands just above the light threshold and returns roughly 15% to 17% extra damage in practice. Swap any piece for something lighter and the whole build gets stronger. Swap for something heavier and it gets weaker.
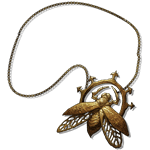
A pendant that pays you for staying light. The bonus is calculated from your equip load percentage and tops out at 25% increased damage with nothing equipped, which is why every armor choice in this build is a weight decision. It boosts output damage across the board, so ranged attacks, throwables, spells and melee all benefit. With this loadout it lands around 15% to 17%.
How to Obtain
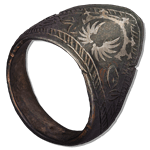

The effect the build is named after, and it must sit in the lamp's first socket to work. Firing without ammunition costs you a slice of health converted to withered health, which is the greyed-out portion of the bar that comes back when you deal damage. A connecting shot refunds it immediately, so as long as you are hitting, you shoot forever. Missing is what actually costs you health.
How to Obtain


Combat Strategy
- ▸Check that the Umbral Eye of Lydia the Numb Witch is in the lamp's main socket. It does nothing in a secondary slot.
- ▸Confirm all five Aelstrix runes are socketed, three in Jeffrey's Dagger and two in the Broken Bucket.
- ▸Drop any armor you do not need before a hard fight. Every point of weight cuts into the Princess' Sting bonus.
- ▸Summon a co-operator or an NPC where one is available, so the boss has a target that is not you.
- ▸Open at maximum range with a fully drawn heavy shot while the boss is still closing on your summon.
- ▸Fire in bursts that stop just short of emptying stamina, then let it refill rather than pushing into an empty bar.
- ▸Reposition sideways rather than backwards between volleys, which keeps the boss facing your summon.
- ▸Swap to bleed arrows against enemies that stagger, since the Vixys rune speeds the buildup.
- ▸Keep firing once ammunition runs out. The Lydia eye converts the cost into withered health rather than blocking the shot.
- ▸Land the next shot to reclaim the withered health immediately. A miss is what turns the effect into real damage taken.
- ▸Break off to soulflay when the boss is exposed, where the two secondary eyes add 50% soul damage.
- ▸Retreat to a full stamina bar before re-engaging, because the heavy draw is slow and cannot be cancelled cleanly.
- ▸Expect an awkward pull time on the heaviest shots and lead moving bosses rather than tracking them.
- ▸Fight without a summon only once you are comfortable, since holding aggro yourself removes most of the build's safety.
- ▸Favour the Assassin's Bow against high-health bosses and a status bow against anything that staggers or bleeds.
- ▸Treat getting hit as a positioning error rather than a gear problem. Nothing in this loadout is built to absorb damage.
Sources
Verified: 2026-09-08 · All content is original with full credit to original creators.