Infinite Cast Umbral Frostbringer
 Orian Preacher
An Umbral caster that pairs a 5 slot catalyst with the Pendant of Atrophy, so spells keep coming out after the mana bar is empty. Grieving Gaze rains ice on anything standing still, Latimer's Javelin covers range, and landing those hits converts withered health back into real health. Pieta's Sword and Elianne the Starved's Sword sit in the off hand at +10 for the secret paired attack the Odd Stone unlocks.
Damage
5,000 to 7,000 per Grieving Gaze hit on New Game Plus. 469 and 418 attack power on the paired swords
Survivability
40 Vitality, Light equip load, no heavy mitigation. Anchorite's Ring covers the casting window
Boss
Septic Heave poison cut the final boss from roughly ten attempts to two

Orian Preacher
The starting class with the highest Radiance stat in the game, so holy scaling is available from character creation with no unlock required. It begins frail and already holding a catalyst, which suits a character that wins fights with spells rather than with a weapon.
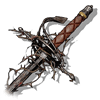
The higher attack power half of the paired short swords, dealing pure Holy damage with no physical split at all. Its A- Radiance scaling is doing most of the work at 55 Radiance. It exists in this build for the paired special attack rather than for a regular melee string.
How to Obtain
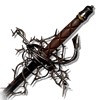
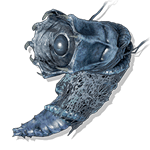
The reason the whole spell list fits at once. Five spell slots is the most of any Umbral catalyst, and C+ scaling in both Radiance and Inferno pays off at a 55/55 split where every other Umbral catalyst leans on one stat. Its raw spellpower is the lowest of the group, which is exactly the gap the Barrage Root fills.
How to Obtain
The creator runs no fixed set here and treats the slot as open. What matters is staying inside the Light equip load bracket, which preserves the fast dodge this build depends on for survival. Pick whatever pieces keep you under the threshold once the swords and catalyst are equipped.
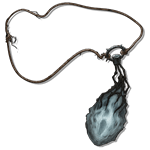
The engine of the build. It lets Umbral spells fire even with an empty mana bar, charging wither damage instead, and wither health comes back when you land hits. Latimer's Javelin recovers the most on a connect, so an empty bar stops being a hard stop and becomes a resource you spend and win back.
How to Obtain
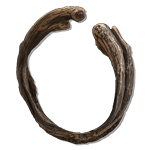


A quest consumable rather than a combat item. Showing it to Pieta while both swords are equipped unlocks the paired special attack that the two weapons otherwise never get. It also grants Holy and Wither defence when used.
How to Obtain
Combat Strategy
- ▸Confirm equip load is still in the Light bracket after any gear swap.
- ▸Decide the flexible ring before the fight. Anchorite's Ring for bosses that close distance, Ring of Radiant Preeminence if you are carrying Piercing Light.
- ▸Check that four spell slots are filled, since the Barrage Root removes one of the catalyst's five.
- ▸Lead with Diminishing Missile to cut the target's attack and defence for the rest of the fight.
- ▸Follow with Latimer's Javelin from range while the debuff is applying.
- ▸Place Grieving Gaze where the enemy is heading rather than where it currently stands.
- ▸Alternate Latimer's Javelin at range and Grieving Gaze when the enemy commits to an approach.
- ▸Cast Grieving Gaze through Umbral walls to damage what is on the other side without exposing yourself.
- ▸Keep casting once mana is gone, since the Pendant of Atrophy converts the cost into withered health.
- ▸Land Latimer's Javelin to recover withered health, which returns close to half a bar against most bosses.
- ▸Treat Grieving Gaze as a secondary recovery tool, since it only pays out if the enemy stays in the ice.
- ▸Retreat and reset spacing rather than trading hits, because the Light load leaves almost no mitigation.
- ▸Against the final boss, switch the plan to Septic Heave and apply poison as often as possible.
- ▸Poison chews a percentage of maximum health, so it scales with the inflated New Game Plus health pool instead of falling behind it.
- ▸Hold Grieving Gaze for moments when the boss closes to melee range, since casting it is risky against fast targets.
- ▸Swap to Anchorite's Ring for the extra defence during casting animations.
Sources
Verified: 2026-09-16 · All content is original with full credit to original creators.