Ravager Wither Grand Sword
 Hallowed Knight
A Grand Sword bruiser that weaponizes Wither damage by chaining uninterruptible charged heavies through enemy attacks. The Umbral Eye of Loash converts damage taken during a charge into Wither, and the landing hit instantly restores that chunk of health, so every trade favors the player. Ravager Gregory's Sword hits Physical, Holy, and Wither layers while Umbral Weapon and Diminishing Missile amplify every swing.
Damage
A+/A+ Strength + Radiance scaling on Ravager Gregory's Sword at +10. Triple-layer damage (Physical, Holy, Wither).
Survivability
Uninterruptible heavy charges via Umbral Eye of Loash convert damage taken into wither that is restored on hit.
Boss
Tears through posture bars. Every trade is net-positive thanks to the Loash restoration loop.

Hallowed Knight
Balanced Strength/Radiance starter with the highest starting Endurance of any class, plus a Vitality head-start. The stat spread matches the Ravager Gregory's Sword's 30 Strength / 30 Radiance requirements and leaves room to branch into Inferno for Umbral spellcasting.
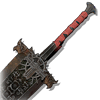
The centerpiece weapon. Split Physical, Holy, and Wither damage on a Grand Sword chassis with Strength and Radiance scaling, which reach A+ at max upgrade. The Wither portion is what fuels the trade loop with Umbral Eye of Loash.
Mods & Attachments
- ▸Gravix Rune x2— Socket two Gravix runes into the sword's STR and ALL slots. Each rune increases physical damage while two-handing, stacking directly with the Adyrqamar Ring two-handed bonus.Wiki
- ▸Satus Rune x1— Socket one Satus rune into the RAD slot to boost the weapon's Holy damage layer alongside the Strength/Radiance scaling.Wiki
How to Obtain
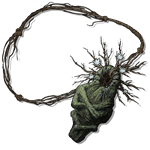
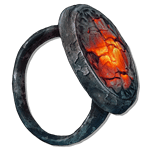
The keystone pendant for the build. Stacks multiplicative Wither damage on top of the Ravager Gregory's Sword's innate Wither layer plus the Umbral Weapon buff, while simultaneously padding Fire and Holy defenses for the layers the Lightreaper's Shield does not fully cover.
How to Obtain
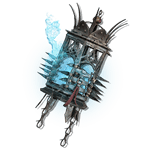
The build's defensive and offensive engine. Umbral Eye of Loash in the main socket converts all damage taken during a heavy attack charge into Wither damage while making the charge uninterruptible. Every hit you land then siphons that withered health back, turning enemy combos into free healing.
Mods & Attachments
- ▸Umbral Eye of Loash— Main socket. While charging a heavy attack, damage received is converted to wither damage and posture cannot be broken. Connecting the heavy attack restores the withered health back to the character, so trades always come out even or in your favor. Retrieved by soulflaying the Umbral Belly in Path of Devotion.Wiki
How to Obtain
Combat Strategy
- ▸Cast Umbral Weapon to apply the Wither damage buff for roughly 90 seconds before engaging.
- ▸Confirm two Nartun runes are socketed on the Lightreaper's Shield for the passive mana loop.
- ▸Verify Umbral Eye of Loash occupies the main Umbral Lamp socket.
- ▸Cast Diminishing Missile on the primary target to reduce its attack and defense for 15 seconds.
- ▸Close to melee range and begin charging a heavy attack with the Ravager Gregory's Sword.
- ▸Let the boss start its combo. With Loash active, posture cannot be broken and damage taken becomes wither.
- ▸Release the charged heavy. The connecting hit restores the withered health taken during the charge.
- ▸Follow with a regular combo while the Diminishing Missile debuff is still up.
- ▸Refresh Diminishing Missile every 15 seconds so heavy hits always land on a softened target.
- ▸Refresh Umbral Weapon when the buff timer nears zero to keep the Wither layer active.
- ▸The trade loop (damage taken during charge, restored on hit) is the primary healing source, so fall back to it any time mana or Sanguinarix runs low.
- ▸Charged heavies launch smaller enemies into the air, opening windows to heal or reposition.
- ▸Nartun runes on the shield regen mana passively, so buffs stay active across long fights.
- ▸Against bosses that stagger-break mid-charge, wait for a predictable wind-up before starting the charge so the heavy lands during their punish window.
- ▸Against multi-phase bosses, drop an Umbral Guardian during transition animations so background damage chips through the phase swap.
- ▸Against fire-weak bosses, lean harder on the Ring of Night's Fire + Faceless Carving Fire layers instead of relying on pure Wither.
Sources
Verified: 2026-04-21 · All content is original with full credit to original creators.