100% Crit Gragu
 Gragu
GraguGragu's Revered Heart is supposed to be your healing flask, and this build deliberately empties it and leaves it that way. The Hunger node pays out up to 60% Critical Hit chance for as long as the heal sits at zero, and stacking that against four support Tarstones and the Acolyte's Stone pushes the sidearm to 95% critical chance, charged melee to 93%, and ordinary melee swings to 78%. From there you are only choosing which nuke to point at the target. Fusillade turns the Naylshotte into a burst of crit loaded shots for bosses, and Staggering Blow rips the heart out of most small and medium enemies outright.
Damage
95% sidearm crit chance, 93% charged melee, 78% normal melee. Fusillade adds +100% crit damage per shot
Survivability
Deliberately zero. The build runs with no healing at all to keep Hunger active
Boss
Fusillade flurry into Fragile stacks. Staggering Blow one-shots small and medium humanoids

Gragu
Gragu the Insatiable is the cannibal shell, and the only one whose healing sits outside the game's normal item economy. Instead of a flask he carries the Revered Heart, a charge based heal that refills by killing enemies. His other ability is Staggering Blow, a punch you charge up before releasing, which throws whatever it lands on into heavy stagger.
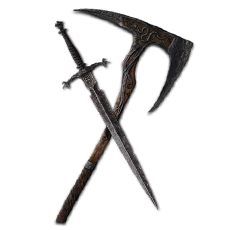
The creator's pick for Gragu because it is fast rather than heavy, and speed is what a crit build actually wants. Every extra strike is another roll against your critical chance, so a weapon with multi hit light attack strings converts the Hunger bonus into damage far better than a slow one would. It also arrives pre-upgraded to Level 3, which saves you a meaningful amount of material this early.
How to Obtain
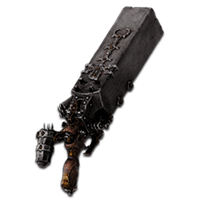
The default sidearm you are handed in the prologue, and the build's actual boss killer. Nothing about it needs to be earned, which is the point, because every sidearm Tarstone the route collects is an immediate upgrade to a weapon already sitting in your inventory. It fires an explosive blast rather than a single projectile, and it accepts all three sidearm stones this build runs.
How to Obtain
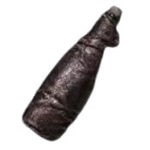
The active slot pick, chosen purely as a Resolve backstop. Both of this build's damage buttons are Resolve purchases, and the way the build stalls is running the bar dry with a boss still standing. Drinking one puts you straight back into Staggering Blow or a charged Light Attack.
How to Obtain

Combat Strategy
- ▸Dump the Revered Heart before you engage anything that matters. Hunger only pays out while it reads empty, and that 60% Critical Hit chance is the foundation every other stone is multiplying.
- ▸Take the Arbiter's Prize to Level 4 before anything else you upgrade. The Bloodcurse infusion becomes permanent at max rank, which means it stops charging you 30 Resolve every time you want it back.
- ▸Get Viletongue Hedron to Level 4 as the second upgrade priority. It makes the sidearm's Bloodcurse infusion permanent too, so Fusillade Stone is not competing with it for the same Resolve bar.
- ▸Slot Common Moonshine in the active item slot. Both of your damage buttons cost Resolve, and this is the only way to refill the bar mid fight without disengaging.
- ▸Open with the running light attack on the Axe and Dagger. It throws multiple strikes in one motion and the Duality Stone makes each of those strikes land twice, which is usually enough to clear a full group in one combo.
- ▸Charge Staggering Blow into any small or medium humanoid rather than fighting it normally. With Heartless unlocked Gragu tears the heart out and kills it outright, so this is your trash clear rather than a big hit you save.
- ▸Spend Acolyte's Stone charges freely once it is at Level 4. It drops to 30 Resolve at max rank, which means a full bar buys three charged Light Attacks, each one rolling against 93% critical chance.
- ▸Avoid Heartless against packed groups. The animation where Gragu inspects the heart he has just pulled out leaves you standing still and open, and a second enemy will punish it.
- ▸Switch to the Naylshotte the moment a boss health bar appears. The sidearm is where the build's real damage lives, and it sits at 95% critical chance once Hunger is maxed.
- ▸Lead with a few ordinary shots to seed Fragile. Enfeebling Stone applies up to 7 stacks per strike, and Fragile makes the target take bonus damage from every weapon attack that follows.
- ▸Fire Fusillade Stone at 80 Resolve or higher. The sidearm dumps a flurry of consecutive shots instead of one round, and at max level every shot in that flurry carries +35% Critical Chance and +100% Critical Damage.
- ▸Let your health drop rather than playing around it. Spite Stone raises ranged damage up to 160% once you are at 50% health or below, so the build rewards the position it forces you into anyway.
- ▸Pick the melee infusion to suit the fight. Arbiter's Prize gives Bloodcurse, which lines up with the Bloodcurse the sidearm is already applying, while Serpent Stone swaps it for Poison if you would rather split the statuses.
- ▸Take Magdalena's Memento over the Acolyte's Stone when a boss is punishing you for standing still. It costs 100 Resolve instead of 30 and only buys you one attack per bar, but the flurry lifts Gragu into the air and gives him invulnerability frames the Acolyte's charged swing does not have.
- ▸Add Marksman's Stone only if the last 5% bothers you. It takes ranged critical chance from 95% to a literal 100%, at the cost of a support slot that is currently producing more damage than the difference is worth.
- ▸Put points into Harvest if you want to stop playing this way. Its fourth level takes the Revered Heart to eight uses, which is a genuinely safer build and turns Hunger completely off at the same time.
Sources
Verified: 2026-09-23 · All content is original with full credit to original creators.