Frost Nuke Eredrim
 Eredrim
Eredrim built around a single loop. Stack Frost until the target freezes, then dump almost the entire Resolve bar into a Fusillade Stone sidearm burst. The Great Martyr's Blade is the only weapon that takes a Frost infusion, and Apathy's final level pushes damage against frozen enemies to 200%, which is what turns that four second freeze window into 80 to 90 percent of a boss health bar. Outside of bosses the build falls back on running attacks and a heavily buffed Shoulder Bash for stagger and crowd control.
Damage
Up to 20,000 in a single Fusillade burst. 200% damage to Frozen targets, +100% Critical Damage per shot
Survivability
Frost immunity from Apathy. Shoulder Bash inflicts 10 Weak stacks so targets hit softer
Boss
80 to 90 percent of a boss health bar per freeze. Four second window to spend the Resolve bar

Eredrim
Eredrim the Venerable is the heavy knight shell, built to absorb hits and break enemies rather than dodge around them. His Shoulder Bash is a charged attack that deals health damage, stagger damage and break damage in one swing, and Ethereal Diapason is a shockwave that breaks every enemy in range. His Executioner passive builds Slaughterer stacks whenever he ripostes, which lowers the health threshold at which an enemy can be executed outright.
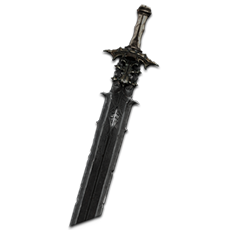
The only weapon in the game that accepts a Frost infusion, which is the entire reason it anchors this build. It is a two-handed sword that deals heavy damage at medium range and swings slowly enough that its normal attacks are a liability against groups. Running light and running heavy attacks are the way around that, and both are strong enough to carry the trash clearing half of the build on their own.
How to Obtain
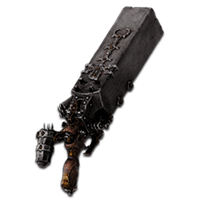
The sidearm that delivers the nuke. It is an explosive weapon that releases a blast on impact, and it accepts every Tarstone this build needs in the ranged slot. Any of the four Fusillade compatible sidearms will run this setup, but Naylshotte is available from the prologue, so there is no gating between you and the burst once the stones are in place.
How to Obtain

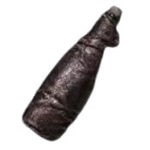
The passive item slot. Summoning a Grisha to fight alongside you is not about its damage, it is about buying time. Shoulder Bash and the freeze phase both ask you to stand still and commit, and a second target on the field is what lets you finish those charges without being interrupted.
How to Obtain
Combat Strategy
- ▸Take Warden's Stone and Viletongue Hedron to Level 4 first. Both infusions become permanent at max rank, which removes all Resolve upkeep from the stacking phase and leaves the whole bar free for the burst.
- ▸Confirm Apathy is at its final level. Everything else in this build is a multiplier on the 200% damage it grants against Frozen targets, and without it the freeze window is barely worth using.
- ▸Get Fusillade Stone to Level 4 before treating this as a boss killer. Levels 3 and 4 supply the +35% Critical Chance and +100% Critical Damage that make the flurry a nuke rather than a spray.
- ▸Slot Common Moonshine as your active item. It restores 30 Resolve on use, which is the difference between reaching the 80 Resolve threshold inside the freeze window and missing it.
- ▸Open on the boss with the Great Martyr's Blade and keep swinging. The Frost infusion is permanent, so every connected hit builds toward the freeze with no resource spent.
- ▸Do not lead with normal attacks against groups. Running light and running heavy attacks are the answer to the weapon's slow swing speed, and both are excellent.
- ▸Feed Perforation with melee hits. Wounding Stone applies 7 Perforation stacks per strike at max rank, and enemies carrying those stacks take bonus damage from sidearm attacks.
- ▸Use Shoulder Bash on anything that is not a boss. With Anguish it deals 150% damage, inflicts 10 Weak stacks so the target hits you softer, and lands massive stagger damage.
- ▸Wait for the target to freeze completely rather than firing on partial Frost. The 200% multiplier only applies to Frozen enemies, and a premature burst wastes the Resolve bar.
- ▸You have roughly four seconds once the freeze lands. That is more than enough time for the full Fusillade flurry, so there is no need to rush the input.
- ▸Fire with at least 80 Resolve banked. Below that threshold Fusillade Stone does not trigger at all and you get an ordinary sidearm shot instead.
- ▸Let Rupturing Stone do the follow up work. Every critical projectile in the flurry deals 20 Break Damage at max rank, so the burst also drives the target toward a break state.
- ▸Pick Shoulder Bash over Ethereal Diapason. Both deal Break Damage, but Shoulder Bash carries far more stagger. The tradeoff is that it is slow to charge, so the timing has to be deliberate.
- ▸Skip Tier 3 of the skill tree entirely. Radiance, Carnage and Resonance all feed Ethereal Diapason or Executioner splash, and neither matters to the frost loop.
- ▸Leave Tank at zero points. It only pays off with every level unlocked and at least 50 Slaughterer stacks banked, which is not where this build spends its time.
- ▸Swap Wounding Stone for Thief's Stone if you stop caring about the one shot. Thief's grants up to 5 Warp stacks per strike for attack speed, though running attacks are already fast enough that it rarely earns the slot.
Sources
Verified: 2026-09-09 · All content is original with full credit to original creators.