Heart Harvest Gragu
 Gragu
GraguMortal Shell 2 front loads its difficulty, so the hardest walls in the game arrive in the first few hours when you have the least to fight them with. This build answers the two specific problems that cause it: no reliable healing and no damage. Gragu refills his own heal by killing things, which turns the run between beacons into a free top up, and the Axe and Dagger carrying a Bloodcurse infusion gives you a status to stack while your weapon levels are still low. Staggering Blow covers everything too big to trade with.
Damage
Staggering Blow at 170% damage with 40 Break Damage. Heartless kills small and medium humanoids outright for 150 splash
Survivability
8 Revered Heart charges at +30 Health each, 80% refunded per kill. Effectively unlimited overworld healing
Boss
Heavy stagger locks large enemies out of their turn. Grisha Remnant summon carries the early gate bosses

Gragu
Gragu the Insatiable is the cannibal shell, and the only one that sits outside the game's healing item economy. Rather than a limited flask he carries the Revered Heart, a charge based heal that refills by killing enemies. His Staggering Blow is a chargeable punch that throws its victim into heavy stagger, and the longer it charges the harder it lands.
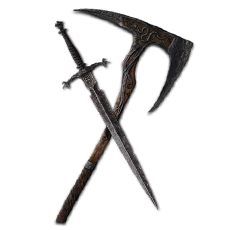
The best weapon available this early and the reason the build has a damage plan at all. Its light attack strings are fast, which matters more than raw numbers when your job is applying a status, and it is one of only three weapons that accepts the Arbiter's Prize Bloodcurse infusion. It also takes Magdalena's Memento later, so nothing you invest in it becomes dead weight.
How to Obtain
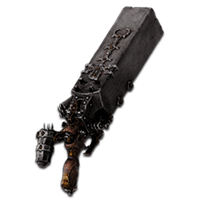
The sidearm you already own, which is the main reason it is in this build. It fires an explosive blast rather than a single projectile, and it happens to be compatible with all three of the sidearm Tarstones the route picks up. No detour is needed to get it, so every stone you find for it is an immediate upgrade to a weapon already in your hands.
How to Obtain

An active item that summons a Grisha spirit to fight alongside you, and the creator's recommended answer to the early bosses. It also works passively, giving your melee hits a small chance to call one in unprompted. Picking up more copies raises both the summon damage and that passive chance, so it keeps scaling if you find others.
How to Obtain
Combat Strategy
- ▸Put your first points in Bloodthirst and Harvest before anything else. These are the two nodes that make the healing loop work, and until they are in place Gragu is a fragile shell with no flask.
- ▸Get the Arbiter's Prize to Level 4 as your upgrade priority. The infusion is permanent at max rank, which means Bloodcurse stops costing 30 Resolve per application and the whole damage plan becomes free.
- ▸Spend currency the moment you have it. There is no reason to hoard in this game, so push weapon levels and shell levels as high as they will go every time you pass through the Marrow Keep.
- ▸Slot the Grisha Remnant in your active item slot before any gate boss. The summon is the single biggest swing available to you this early and it covers the fights the build cannot yet out damage.
- ▸Lead with Axe and Dagger light strings to build Bloodcurse. The Duality Stone makes the combo strike twice, so a single string applies far more status than the animation suggests.
- ▸Charge Staggering Blow into committed enemy animations rather than open exchanges. It needs the charge time, and the payoff is heavy stagger plus 40 Break Damage once Anger is at its third level.
- ▸Use Staggering Blow as an opener against grouped humanoids. With Heartless maxed it kills small and medium targets outright and the corpse explodes for 150 splash damage into whatever is standing nearby.
- ▸Fire the Naylshotte at anything already weakened. The Volatile Fragment makes enemies killed by ranged attacks explode for up to 35 splash damage, which is how you clear packs without closing in.
- ▸Kill trash on the way to objectives instead of running past it. Every kill returns 80% of a Revered Heart charge at Bloodthirst level 2, so traversal is where your healing comes from.
- ▸Stay at full Revered Heart when you can afford to. Devourer only pays out while the power is full, and at three levels it hands you extra Gloom, 15 extra Resolve and 20 Health restored per kill.
- ▸Expect Bloodcurse reflections to feed you. Heartwork grants immunity to the status at level 2 and a 3% chance to fully refill the Revered Heart whenever you inflict it at level 3.
- ▸Open with the heal deliberately rather than saving it. Bloodlust makes your next melee attack deal 200% damage after using the Revered Heart, so healing early in a fight is also a damage buff.
- ▸Respec freely, because it costs nothing on the shell. The creator's generalist spread is one point in Escalation, two in Bloodthirst, three in Heartwork, two in Attunement, Harvest as high as it goes, one in Maniac, two in Anger, one in Bloodlust, three in Devourer and three in Heartless.
- ▸Leave Fortify and Hunger at zero for general play. Fortify only refills charges at beacons, which is redundant once kills are doing it, and Hunger only pays out while the Revered Heart is empty.
- ▸Switch into Hunger and Maniac for a dedicated boss attempt. Hunger grants up to +60% Critical Hit chance while the heal is depleted, which is an enormous damage gain if you are willing to fight without healing at all.
- ▸Be careful during the Heart of Vatra escape. The enemies there track hard and can close distance instantly, so dodge through attacks for the invulnerability frames rather than trying to outrun them.
Sources
Verified: 2026-09-10 · All content is original with full credit to original creators.