Unkillable Dual Sword Tank
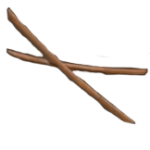 Dual Swords
Stacks Projectile Damage Taken and Backstab Damage Taken reductions to near-immunity, then layers Firm Resolve, Inosasao, and the Onryoki Soul Core to slash damage taken while attacking. Cleansing Prayer and Life Recovery on Amrita Absorption refill health on every hit, making aggressive hit-trades the safest play on Dream of the Nioh and the Underworld.
Damage
Modest melee output. Cleansing Prayer 3 stacks adds +30% melee multiplier, primary role is sustain over burst.
Survivability
99% Backstab DR, 90%+ Projectile DR, 40 to 50% mid-attack DR. Basically unkillable while attacking.
Boss
Trivializes projectile-heavy bosses like Yomi and yokai mages, who deal roughly 10% of normal damage. Face-tanks Dream of the Nioh encounters.

Dual Swords
A fast melee weapon class that scales primarily with Skill, with secondary scaling from Heart and Strength. Its Mystic Art Firm Resolve grants stacking damage reduction every time you land a hit, rewarding sustained aggression with growing mid-attack mitigation.
Weapon class chosen specifically for the Firm Resolve mystic art, which grants stacking damage reduction the moment you start landing hits. Any Dual Swords variant works. Pick one with rapid attack frames so you stack Firm Resolve and Amrita drops as fast as possible.
How to Obtain
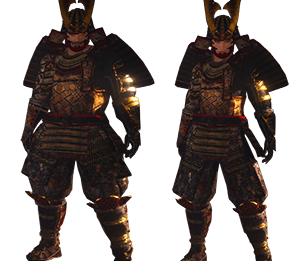
Equip a single Tatenashi piece. With Yasakani Magatama reducing set requirements by 1, that one piece counts as the 2-piece bonus and gives 15% Projectile Damage Taken reduction. Heavy armor, so your Stamina has to be high enough to keep total equipment weight under 70%.
How to Obtain
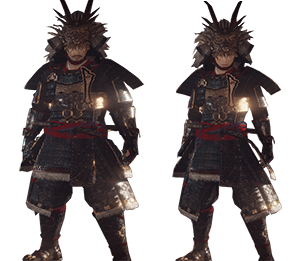
Reduces every active set's piece requirement by 1, letting Tatenashi 1-piece, Arrowsbane 2-piece, and Izanagi's Grace 6-piece all activate one tier higher than they normally would. The single most foundational accessory in the build, since every other piece is sized around the Yasakani discount.
How to Obtain

Brute-type boar spirit. Its passive Damage Taken (Mid-Attack) -15% is the first layer of mid-attack mitigation that lets you face-tank trades. The bonus requires Courage + Strength = 33, which falls out naturally from the build's stat plan.
How to Obtain
The keystone soul core. Damage Taken (Mid-Attack) scales with rank, reaching -21.5% at rank 30. Stacked with Inosasao's -15% and Firm Resolve, total mid-attack mitigation lands around 40 to 50%. Yokai skill Ball of Hatred can be used as a burst option.
How to Obtain


Every armor piece and accessory needs to roll the same three keystone effects to hit the build's resistance targets. Re-temper at the Blacksmith using Umbracite until each piece carries the trio. Without the rolls, you do not reach the 99% Backstab and 90%+ Projectile thresholds.
Combat Strategy
- ▸Apply Rejuvenation Talisman so passive HP regen is ticking the moment combat starts.
- ▸Trigger Cleansing Prayer to one stack before engage by performing a purification action. This is your 2% HP per second base healing layer.
- ▸Confirm Inosasao is primary and Blue Dragon is secondary. The build only works at full mitigation when both passive auras are active.
- ▸Rush in and hit-trade aggressively with Dual Swords skills like Sign of the Cross and Twin Moons. The faster you hit, the faster Firm Resolve stacks build.
- ▸Each landed hit drops Amrita, which Life Recovery (Amrita Absorption) instantly converts into health. Constant attacking is your primary heal source.
- ▸Refresh Cleansing Prayer stacks before they expire at 90 seconds. Hold three stacks during boss windows to gain the +30% melee damage multiplier.
- ▸Layered healing keeps HP filling between hits: Cleansing Prayer 2% per second, Rejuvenation Talisman ticks, and Life Recovery on every hit landed.
- ▸If you do dip critically low, fall back briefly so Rejuvenation and Cleansing Prayer can top you off, then re-engage. Stopping the heal-on-hit loop is the only way this build dies.
- ▸Mid-attack mitigation stack (Inosasao -15%, Onryoki -21.5%, Firm Resolve scaling) means trading hits is safer than dodging through them.
- ▸Tactically turn your back during high-damage splash attacks, wide swings, and unblockable telegraphs. The 99% Backstab Damage Taken stack turns most one-shot attacks into chip damage.
- ▸Use the Onryoki Ball of Hatred yokai skill as a burst tool when a boss is staggered. It opens a brief damage window without breaking the heal-on-hit loop.
- ▸Activate Nuppeppo's Fleshy Fury during Cleansing Prayer 3-stack windows for stacked melee damage. Watch your Ki bar since Fleshy Fury also increases Ki damage taken.
Sources
Verified: 2026-05-08 · All content is original with full credit to original creators.