Onmyo Magic Ninja Build
Pre-buffs Carnage and Talisman of the Fist for raw attack power, then opens with Lightning Shot, Explosive Shot, and Hellgust to stack Lightning, Fire, and Wind on a single target until Confusion procs. Once Confused, the target's incoming damage multiplier and Saturation from water effects let a single Hellshock cast melt bosses in two to three hits. The Grace of Jurojin five-piece adds Life Drain on Onmyo hits and Onmyo Magic Power +50, while a four-piece Shinto Priest set hits the five-piece Servant of the Gods bonus through Yasakani Magatama, granting Enhanced Onmyo Magic from every Sacred Water use. Endgame-only because the Quaking Tonfa, Fujin Helmet, and Grace of Jurojin pieces all farm out of the level 199 Occurs Temple route after the main story.
Damage
Hellshock deletes Confused bosses in 2 to 3 casts. Confusion adds a large damage taken multiplier on top of every elemental tick.
Survivability
Life Drain on every Onmyo hit (Grace of Jurojin 3pc), Auto Life Recovery (Onmyo Magic) at 6pc, plus Shami-choro Auto Life Recovery (Critical) safety net.
Boss
Endgame boss farmer. Trivializes targets by locking them in Confusion before the burst window opens.


Primary weapon and the only piece that has to be Quaking Tonfa specifically. Take it to the Blacksmith and remodel its scaling so that Magic and Skill become the dominant stats, then re-roll inheritances to land Grace of Jurojin. With Magic scaling, the Tonfas double as a stat platform for the build's Onmyo Magic power while still pressuring targets in melee. With Grace of Jurojin attached, the weapon counts toward the five-piece set total alongside Fujin Helmet and the two filler weapons.
How to Obtain


Head armor slot. Fujin Helmet is the easiest Grace of Jurojin head piece to acquire because it drops from a fixed chest location and re-rolls cleanly into the right Grace. It is not part of any armor set, which is the entire reason it is used here. Slot it as the helm so the four Shinto Priest pieces stay on body, hands, waist, and legs without competing for the head slot.
How to Obtain
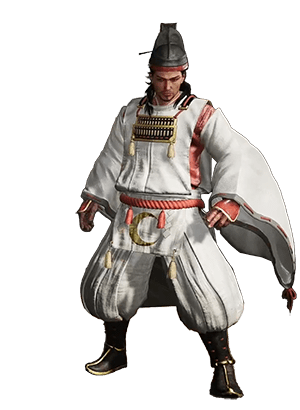


Keystone accessory. Reduces every active set's piece requirement by one, which is the only reason the four-piece Shinto Priest stack lands the five-piece Servant of the Gods bonus. Drop Yasakani and the entire Sacred Water amplification loop downgrades by a tier. Also slots cleanly with the Grace of Jurojin five-piece since the Graces are tracked separately from set bonuses.
How to Obtain

Lightning Ninja guardian spirit. The combination of Faster Movement on perfect Evade and Faster Ki Recovery on Onmyo Magic hit is exactly what this build wants: the perfect evade lets you reposition between casts, and the Ki refund on Onmyo hit keeps the spell rotation looping without forcing recovery breaks. Lightning Damage stacks with the Lightning Shot Talisman opener, and the Status Enhancement Duration buff extends Carnage, Talisman of the Fist, and Confusion windows.
How to Obtain

The keystone soul core. Drops Hellshock Talisman in its Yin position, which is the spell the entire rotation is built around. Hellshock landed on a Confused boss is the burst that two-shots most fights. Hiruko is also the post-story final boss drop, so the soul core is locked behind a story clear and a New Game Plus farm cycle.
How to Obtain


All of the build's Divine-rarity rolls (Quaking Tonfa with Grace of Jurojin, Fujin Helmet rolls, Shinto Priest re-rolls, Yasakani Magatama secondary stats) come out of one farm route: the level 199 Occurs Temple mission in 1864 CE Bakumatsu. Drop in, kill the elite enemy positioned right next to the starting shrine, return to the shrine, repeat. The elite reliably drops Divine pieces, so a single attribute pass cleans up multiple gear slots simultaneously.
Combat Strategy
- ▸At every shrine, brew Hellshock x2, Lightning Shot x12, Explosive Shot x8, Hellgust x3, and Carnage Talisman x5. Re-prep Talisman of the Fist x5 if you plan to use the no-weapon variant.
- ▸Verify the Onmyo Box has Hiruko, Mikoshi Nyudo, Koroka, Demon of Obsession, and Ibaraki Doji in the Yin positions. Hot-swap Demon of Pride for Hellstream Talisman if the upcoming boss is weak to Water.
- ▸Cast Carnage Talisman before engaging. Drink Sacred Water to trigger the Servant of the Gods five-piece, then apply Carnage again so the buff window starts from full duration.
- ▸Lead with Lightning Shot to tag the boss with the Lightning element and apply Saturation if Demon of Pride is active.
- ▸Immediately follow with Explosive Shot for Fire and Burn application.
- ▸Cast Hellgust to add Wind and trigger Confusion the moment all three elements are stacked. Patience of the Gods accelerates this by 24%.
- ▸Once Confusion lands, cast Hellshock. Two casts delete most bosses, three covers anything that survives.
- ▸If Hellshock charges run out before the kill, pivot to Storm of Strikes for the melee burst variant since its damage also scales against Confused targets.
- ▸Drop your weapon and cast Talisman of the Fist beforehand if you want to push the Onmyo amplification ceiling. The trade-off is no melee safety net while spells are on Ki recovery.
- ▸Layered healing: Grace of Jurojin 3-piece adds Life Drain on every Onmyo hit, and the 6-piece adds Auto Life Recovery (Onmyo Magic) when you can fit it. Sacred Water also restores Life on use.
- ▸Shami-choro's Faster Ki Recovery (Onmyo Magic Hit) refunds Ki on every spell hit, so the rotation rarely stalls waiting for the Ki bar to refill.
- ▸Use Demon Dance to close range and stick on the boss while Pulverize handles Ki damage punishes between spell windows.
- ▸The no-weapon Onmyo amplification line: unequip your weapon during the Confusion burst, cast Talisman of the Fist beforehand for bare-handed melee power. Onmyo Magic potency goes up significantly while no weapon is wielded.
- ▸Hot-swap Hellstream (Demon of Pride Yin) over Hellgust for Water-weak bosses. Saturation adds a 20% damage taken modifier that compounds with Confusion.
- ▸Pure Heaven Cursed Earth lets you sustain the Servant of the Gods proc in mob fights without re-positioning, useful for the Yo-kai Realm pool encounters that the build would otherwise need to manually clear with Evil Dispelling Evade.
Sources
Verified: 2026-05-18 · All content is original with full credit to original creators.