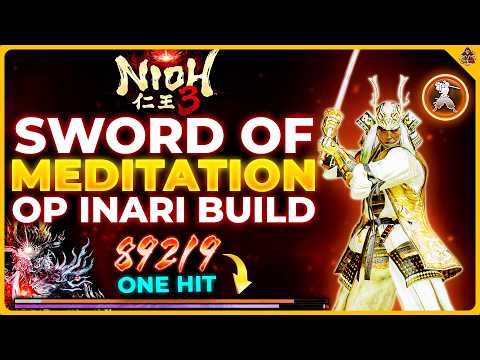
Two-Shot Sword of Meditation Build
 Samurai
Pre-buffs to nuclear levels by stacking the three Hell-talismans (Hellfire, Hellgust, Hellshock) for Confusion, layering Yasakani Magatama's set-discount trick across Brave Demon Hunter, Warrior of the East, and a 7-piece Grace of Inari, then activating Rage on a swap-out Axe before re-equipping the Sword. Every multiplier dumps into a single charged Sword of Meditation strike that lands for 60,000 to 90,000 damage and deletes most New Game Plus bosses in two hits. Highly vulnerable while charging since Double-Edged Arts adds 30% damage taken on top of the build's already glass-cannon stat spread.
Damage
60,000 to 90,000 damage per charged Sword of Meditation hit. Two-shots most NG+ bosses.
Survivability
Glass cannon. Double-Edged Arts adds +30% damage taken. Fortitude II and max Constitution offset only partially.
Boss
Deletes the final boss in roughly 18 seconds across two charged strikes.
Samurai
Heavy-attack stance that scales with Constitution, Heart, and Magic on Sword-class weapons and is the only stance that can run the Crucible Arts skill tree. This build leans entirely on the Samurai side of the dual-style system, using the Sword for the charged Sword of Meditation finisher and the Axe purely as a stat-stick to apply the Rage attack buff.

The keystone weapon. Any Sword-class Crucible variant works as long as it rolls the Sword of Meditation Crucible Art on its martial-art slot. Scales with Constitution, Heart, and Magic, which is why those three stats anchor the level plan. Aim for a Martial Art Damage roll on the secondary stats so the charged finisher value goes up directly.
Alternatives
- Infernal KatanaWiki
How to Obtain

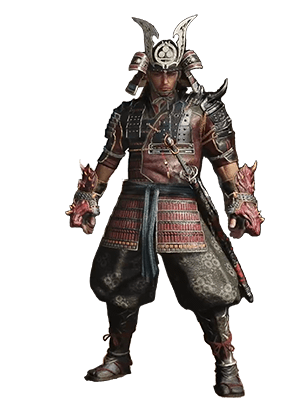
Equip two Brave Demon Hunter pieces. With Yasakani Magatama reducing set requirements by 1, those two pieces count as the 3-piece bonus and grant Martial Art Damage +13.0%. This is the single largest passive damage multiplier in the gear stack.
How to Obtain



The single most foundational accessory in the build. Reduces every active set's piece requirement by 1, which is the only reason Brave Demon Hunter at 2 pieces, Warrior of the East at 1 piece, and Grace of Inari at 6 pieces all activate the next-tier bonus. Without Yasakani the entire stack collapses by a tier.
How to Obtain


Source of the Hellfire Talisman. Required for the burn-application leg of the Confusion stack. Provides Spirit Force Bonus against Scorched enemies as its passive, which feeds into the build's Spirit Force economy during the pre-buff sequence.
How to Obtain


The build wants every armor piece and accessory to push the same damage multipliers and effect-duration rolls. Re-temper at the Blacksmith with Umbracite until each slot carries one of the listed priorities. Without the rolls, the burst window does not crack the 80,000-damage tier.
Combat Strategy
- ▸Swap to the Axe and activate Rage. The 30-second attack buff starts ticking the moment you cast it.
- ▸Swap back to the Sword while Rage is still active. The buff persists across the weapon swap.
- ▸Confirm the Crucible Sword has Sword of Meditation slotted as the Crucible Art and that the talisman loadout is the five-talisman stack (Hellfire, Hellgust, Hellshock, Weakness, Sloth).
- ▸Cast Hellfire Talisman to set a burn field at the engagement spot.
- ▸Cast Hellgust Talisman to apply Blustered, then Hellshock Talisman to apply Shock. With all three elements on the target, Confusion triggers and the boss takes massively increased damage.
- ▸Cast Weakness Talisman to strip enemy defense. Optionally cast Sloth Talisman if the boss is fast and the charge window looks risky.
- ▸Switch to High Stance. Lock onto the boss.
- ▸Hold the strong attack to begin charging Sword of Meditation. Walk steadily toward the boss during the charge. Damage scales with distance traveled, so the longer the approach, the bigger the hit.
- ▸Release in melee range. Expect 60,000 to 90,000 damage on a clean hit. Repeat the charge once more if the boss survives the first swing.
- ▸Use Roaring Dragon Deflect during the approach. A successful Deflect adds Increased Damage Received (Elemental) on the target, layering one more multiplier onto the release.
- ▸Sloth Talisman is the survival lever. Cast it before charging any boss with telegraphed wide swings or fast follow-ups.
- ▸Stop attacking immediately after the burst if the boss survives. Double-Edged Arts is still adding 30% damage taken, and trading swings in melee with no buffs left is a fast way to die.
Sources
Verified: 2026-05-21 · All content is original with full credit to original creators.