Untouched Onmyo Mage Build
Stacks seven pieces of Grace of Tsukuyomi with the Shrine Maiden and Jurojin graces to reach 67% Untouched Onmyo, so two casts out of three cost nothing. Damage comes from the rank 3 elemental shots rather than the stronger Hell spells, because eight charges give the Untouched roll far more chances to fire than the two or three charges a Hell spell carries. Life Drain on magic hits and constant Amrita gauge charge keep the caster fuelled with no downtime, which is what lets a cloth-armor mage hold up through Stone of Penance 7 and three player co-op.
Damage
Hellshock hits nearly 90,000 in a Confusion window. Four rank 3 elements at 8 charges each sustain constant casting.
Survivability
Life Drain on magic hits plus Life Recovery on every Amrita absorption. Living Artifact covers the close-range Geyser Shot windows.
Boss
Clears Stone of Penance 7 and 3 player co-op. Ibaraki Doji is the hard wall due to lightning resistance.

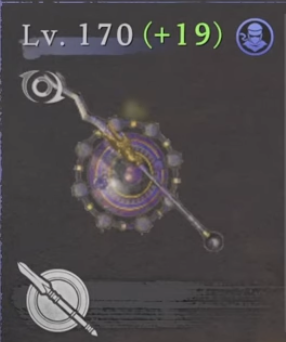
Melee slot, carried almost entirely as a stat platform. The build never commits to melee exchanges, so what matters is which effects you land on it rather than how it swings. Life Drain on elemental damage is the roll that earns the slot, converting a share of your spell damage back into health. Familiarity is capped at 999 to squeeze the maximum out of the inherited effects.
Target Rolls
- ▸Life Drain (Elemental Damage) D+— The reason this slot exists. Returns a portion of your elemental spell damage as health, which is what lets a cloth-armor caster hold position while casting.
- ▸Divine Grace: Grace of Tsukuyomi— Mandatory. The weapon is one of the six Tsukuyomi carriers, and dropping it costs you the whole seven-piece tier.
- ▸Imbue Lightning +16— Gives the weapon a lightning element for the rare moments you do swing it. Low priority next to the Grace and Life Drain.
- ▸Damage Bonus (Magic) D+— Straight spell damage increase. Re-roll toward a higher grade if you get the chance.
- ▸Amrita Bonus (Inflict Scorch) D+— Feeds the Amrita economy that every Life Recovery roll in the build keys off. More Amrita absorbed means more passive healing.
How to Obtain


Head armor and one of the strongest single damage pieces in the build, because it can roll Damage Bonus (Onmyo Magic) at C grade, the highest of any piece here. It sits outside the Shrine Maiden set, which is exactly what the build wants, because the head slot is needed for Tsukuyomi rather than a third Servant of the Gods piece. Note the unusually steep 18 Constitution and 18 Skill activation, which is the only reason those two stats get levelled at all.
Target Rolls
- ▸Damage Bonus (Onmyo Magic) C— The best damage grade on any piece in the build. C outclasses the D+ rolls elsewhere, so this is the piece to chase hardest.
- ▸Divine Grace: Grace of Tsukuyomi— Mandatory. One of the six Tsukuyomi carriers.
- ▸Defense Bonus (Magic) D+— Offsets the Increased Damage Taken drawback that the Tsukuyomi three-piece tier imposes while casting.
- ▸Life Recovery (Amrita Absorption) 3— Standard healing roll. Present on almost every armor piece in the build by design.
- ▸Amrita Gauge Charge +0.7%— Faster Amrita gauge fill, which means more frequent Living Weapon windows and more absorption procs.
How to Obtain


The keystone of the entire build, and the reason the piece counts work at all. Its Reduced Set Bonus Requirement of -1 means every set needs one fewer piece than normal. Six Grace of Tsukuyomi pieces therefore read as the seven-piece bonus, and two Shrine Maiden pieces read as the three-piece bonus. Remove this accessory and the build loses both of its top set tiers at once.
Target Rolls
- ▸Reduced Set Bonus Requirement -1— The single most important effect in the build. It is what makes six Tsukuyomi pieces count as seven and two Shrine Maiden pieces count as three. Never re-roll off this under any circumstances.
- ▸Divine Grace: Grace of Jurojin— The second of only two Jurojin carriers, which is what reaches the Life Drain threshold.
- ▸Fire Damage +6.0%— Lifts Explosive Shot specifically. Useful against the bosses that resist lightning and force you onto fire.
- ▸Spirit Force Charge (Unscathed) +1.7%— Faster Guardian Spirit charge while undamaged. Reliable in this build because the healing stack keeps you topped up.
- ▸Blinding Shell Damage +10.0%— Low value here since the build does not use shells. A re-roll candidate if you can keep the two rolls above.
How to Obtain


Guardian Spirit and the build's second largest Untouched Onmyo source, behind only the Tsukuyomi six-piece. It also grants Faster Ki Recovery on Onmyo Magic and a large heal whenever a Soul Core is gained, both of which feed the no-downtime casting loop. Note this is the Ninja variant of Ho-oh, a different spirit from the separately listed Oh, and the Ninja version is the one carrying the Onmyo bonuses.
Target Rolls
- ▸Untouched Onmyo Magic (Except Summoning Seals) +11.4%— The second largest Untouched source in the build. This roll alone is most of the reason Ho-oh (Ninja) is chosen over any other spirit.
- ▸Onmyo Magic Ki Damage +14.6%— Large Ki pressure bonus on every spell, which is how a caster staggers bosses without landing melee hits.
- ▸Life Recovery (Soul Core Gained) 668— A very large burst heal that triggers on picking up Soul Cores, which happens constantly during a mission.
- ▸Faster Ki Recovery (Onmyo Magic)— Shortens the pause between casts, so the rotation rarely stalls waiting on the Ki bar.
- ▸Decreased Damage Dealt (Onryo)— A drawback roll rather than a benefit. Re-roll it away if the spirit lets you, but it is not worth losing the Untouched roll over.
How to Obtain

Set to the Yang position, which generates a Summoning Seal rather than a Talisman. It carries the build's other Life Drain source, this one keyed to lightning damage, plus a flat Elemental Damage boost that lifts all four elemental shots at once. The Damage vs. Revenants roll is dead weight in solo play but live in co-op.
Target Rolls
- ▸Elemental Damage +5.5%— Requires 150/7. Lifts all four elemental shots simultaneously, which makes it the most broadly useful roll on the core.
- ▸Life Drain (Lightning Damage) C— A full grade above the D+ Life Drain on the melee weapon. Converts lightning spell damage into health.
- ▸Amrita Bonus (Inflict Scorch) D+— Feeds the Amrita loop the armor rolls key off.
- ▸Damage vs. Revenants +7.5%— Requires 150/10. Does nothing in solo play. Live only in co-op, so treat it as a re-roll candidate if you play alone.
How to Obtain

The equipped scroll, and it functions as a gear slot in its own right because its rolled effects apply to your character. This one supplies Dual Mastery (Common), which is what lets the build slot both Awakening and Summoning Basics instead of choosing between them. It also counts toward Grace of Tsukuyomi. The trade is steep, since its special rules raise accessory-slot enemy strength by 80% and add another 10% enemy rampage on top.
Target Rolls
- ▸Dual Mastery (Common)— The roll that makes the mastery setup possible, letting you slot Awakening and Summoning Basics at the same time. A scroll without it costs you one of the two outright.
- ▸Ultimate Magic— Mandatory on any replacement scroll. A scroll missing it is a straight downgrade no matter what else it carries.
- ▸Onmyo Magic Damage +9.2%— Direct spell damage. Worth comparing between scroll candidates, since the farming scroll rolls a slightly higher +9.5%.
- ▸Divine Grace: Grace of Tsukuyomi— The scroll is one of the six Tsukuyomi carriers, which is easy to forget when swapping scrolls. Losing it drops you out of the seven-piece tier.
- ▸Untouched Summoning Seals +1.3%— A separate Untouched pool that applies to summoning seals only, which the main Untouched Onmyo rolls explicitly exclude. Emmy estimates a true Untouched Onmyo roll on a scroll would land around this same 1.4% range.
How to Obtain

A second Picture Scroll kept purely as a farming tool, swapped in when hunting accessory upgrades rather than worn for its stats. Its special rules combine an 80% accessory drop rate with a 10% chance for Grace of Tsukuyomi specifically, which is the exact pairing needed to gamble for the missing Untouched Onmyo roll on the second accessory slot. Its two bosses, Onryoki and Yagyu Munenori, are both straightforward fights, so runs stay fast.
Target Rolls
- ▸Onmyo Magic Damage +9.5%— Marginally higher than the equipped scroll's +9.2%, which is worth noting if you ever consider promoting this one to the main slot.
- ▸Ultimate Magic— Present here too, so this scroll would be a viable main-slot candidate if it ever rolled Dual Mastery.
- ▸Living Artifact Duration +6.4%— Extends the defensive window you pre-cast before closing to Geyser Shot range. Genuinely useful in Penance 7 content.
- ▸Life +291— Flat health, which matters more than usual on a cloth-armor caster.
- ▸Untouched Summoning Seals +1.3%— Same summoning-seal-only Untouched pool as the equipped scroll.
How to Obtain
The number the whole build optimises for currently sits at 67%, meaning roughly two of every three casts do not consume a charge. The stack comes from the Grace of Tsukuyomi six-piece at +15.0%, Ho-oh (Ninja) at +11.4%, the Servant of the Gods three-piece at +11.0%, and the Lightning Omamori at +5.3%, with the rest coming from smaller rolls. Emmy places the ceiling at roughly 75% and is targeting 70%, with the two open sources being an Untouched roll on the second accessory and one on the Picture Scroll, which he estimates would add about 1.4%.
Combat Strategy
- ▸Brew all four rank 3 shots at a shrine before entering, along with Hellgust, Hellshock, and the Carnage and Fist Talismans. Sacred Brushes are unlimited from the tea house vendor, so carry as many as you can hold.
- ▸Confirm both Soul Cores are set to the Yang position at the shrine. Yang produces the summoning seals the build wants, while Yin would give talismans instead.
- ▸Check that the equipped Picture Scroll still carries Dual Mastery (Common) and Ultimate Magic. A scroll swap that loses either one silently removes a mastery slot.
- ▸Cast Living Artifact before engaging in Stone of Penance 7 content, since you will need to close to short range for Geyser Shot and the particle clutter makes attack tells hard to read.
- ▸Cycle the rank 3 shots continuously rather than rationing them. At 67% Untouched, sustained casting is the correct play and stopping to conserve charges wastes the build's entire premise.
- ▸Stack three different elements on a target to trigger Confusion, which drains enemy Ki and inflates incoming damage.
- ▸Spend summoning seals freely between casts. Sixteen Sunakake-baba charges and four Bloodedge Demon charges are far more than a single fight needs.
- ▸Use a Sacred Brush the moment charges run low. It returns about a third of your charges, which is roughly three on a rank 3 shot.
- ▸Open the kill window once Confusion is fully stacked, since the damage taken multiplier is what makes the burst worth spending limited charges on.
- ▸Cast Hellshock for the single biggest hit available, observed at nearly 90,000 damage against a softened target.
- ▸Do not open with Hellshock. Its two to three charges are gone immediately, and outside a Confusion window the damage does not justify the charge cost.
- ▸Ibaraki Doji is the hardest fight for this build. She is naturally tanky, hits extremely hard, and resists lightning, which removes both Thunderstorm Shot and Hellshock from your damage. Use fire, water and wind against her instead.
- ▸Lightning resistance also makes Confusion harder to max on her, which lowers your damage a second time and stretches the fight out well beyond its normal length.
- ▸Kusanagi resists both fire and water. Cycle all four elements anyway, using fire and water purely to apply Confusion while wind and lightning carry the actual damage.
- ▸When a boss resists your strongest element, switch elements rather than trying to force damage through the resistance. Confusion stacking is worth more than any single element's raw numbers.
- ▸Leave the Hell spells out of the loadout apart from Hellgust. They hit harder but carry only two to three charges, which starves the Untouched Onmyo loop and wastes Sacred Brush value.
- ▸The Untouched Onmyo ceiling is around 75% and this build sits at 67%. The two remaining sources are an Untouched roll on the second accessory slot and one on a Picture Scroll, worth roughly 1.4%.
- ▸Stone of Penance 7 combined with three player co-op produces the most inflated boss stats in the game. The build clears it, but Emmy's own verdict is that it is a challenge run rather than an efficient way to play.
- ▸Wasting a Sacred Brush at partial charges costs nothing meaningful. The vendor supply is unlimited, so use them early rather than risking a dry rotation mid-fight.
Sources
Verified: 2026-09-01 · All content is original with full credit to original creators.